Even if you don't intend on using one of their compilers, these books cover a lot of concepts which apply to PIC microcontrollers in general. These books are also available to read for free online. For more information please see the store. What is a PIC? A PIC is a small electronic chip, with a number of pins/connections, which you can control - by writing code ("firmware") for it. At the simplest level, you can switch things on and off. At a more complex level you could do something like running an engine management system. PICs also have a number of "peripheral" devices built in, such as a module for doing analogue-to-digital conversions or a real-time-clock. Required Elements (What You Need) To build a functional circuit with a PIC, the following four elements are normally necessary:
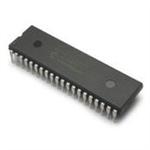
1. PIC Microcontroller
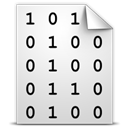
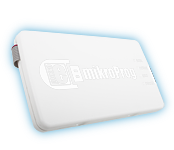
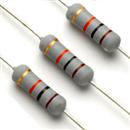
PICs can be divided into three categories - namely 8-bit, 16-bit and 32-bit - depending on their internal architechture. 8-bit PICs are most commonly used, and include the 10-, 12-, 16- and 18-series. There are many different PICs to choose from. Differences between PICs include speed, memory size, number of pins, peripheral modules and price. When choosing a PIC you might want to use the Microchip website or MAPS (Microchip Advanced Product Selector). One of the most commonly used PICs is the 16F887 (or 16F877 - a predecessor). You will need to download the PIC's datasheet. As already mentioned, PICs contain a number of peripheral modules and other features, and the datasheet will provide details on all of these. Config registers for the PIC need to be set in your code (such as whether the PIC should use an internal or an external oscillator) and registers controlling the peripheral modules (such as whether a pin should be an input or an output) also need to be set. The PIC may also require some external components, such as a resistor to tie the reset pin to +5V (so that the PIC doesn't constantly reset). 2. Firmware The file which you will eventually load into your PIC is called a "hex" file, and essentially consists of just numbers. If you are really looking for a challenge then you can try and write this file yourself, but normally a "higher-level" language is used. The next level up is called Assembler, and consists of a number of simple instructions. You will find details on the Assembler commands availble for a particular PIC in it's datasheet. Above that are higher-level languages such as "C" or "BASIC". "Compilers" interpret the higher-level code and convert it to assembler, which is then converted to a hex file. Compilers also normally include a number of "libraries" for easily performing common tasks, such as displaying text on an LCD or even writing data to an SD card. 3. Programmer A programmer is a device which loads your hex file (firmware) into the PIC. Most programmers only program a certain range of PICs. (The "MikroProg" programmer, which we sell, programs almost any PIC.) PICs can be programmed either "in-circuit" or "out-of-circuit": Out-of-circuit means that you will need to remove the PIC from the electronic circuit in which it will be used and insert it into a programmer (/ programming adapter) in order to program it. This is normal practice for "DIP" ("through-hole") package PICs (a "package" is a standard shape/size which a PIC, or other electronic component, comes in - one component may also come in a number of different package options). In-circuit (called In Circuit Serial Programming, or ICSP) means that the electronic circuit in which the PIC is used contains a programming connector, to which you can connect a programmer and program the PIC without removing it from the circuit. This is normal practice for "surface-mount" package PICs. You can design your circuit to include a connector for ICSP. Out-of-circuit is normally recommended for beginners. Bootloaders Some PIC microcontrollers may come pre-programmed with a "bootloader", which can eliminate the need for a programmer. Because newer PIC microcontrollers have the ability to write to their own program memory ("program themselves"), firmware can be communicated to the PIC via, for example, RS232 or USB; and the bootloader will "program" the PIC with this firmware. 4. Electronic Components These include components required to run the PIC (such as components for providing it with power, or an external oscillator) and components with which the PIC will interact (such as buttons or LEDs). Debugging More often than not, your firmware/project will not work perfectly the first time. Debugging involves, amongst other things, "pausing" your firmware at certain points in order to take measurements/readings. This enables you to see exactly what is happening and why the firmware is possibly not behaving as expected. Two debugging options are available: Hardware and software. Hardware debugging means that you build the physical circuit, and then connect a "debugger" (piece of hardware) to it which controls the debugging process (from your computer). Software debugging is possible with Proteus, and means that you build the circuit on the computer (you would normally do this anyway if you are planning on making a PCB) and "simulate" it. Some of the advantages of this are: - You don't need to buy any physical components yet, or spend time/money building physical prototypes. - There is no chance of blowing anything up. - Accurate readings can easily be taken from any part of the circuit. - Many "virtual" tools are available; such as oscilloscopes, etc. - Changes can be made quickly and easily. One disadvantage may be that the specific component you are planning on using in your circuit is not available in the software simulator's libraries. In this case there may be a "generic" or similar part available, or the manufacturer might provide an easily-integratable SPICE model for the part. The possibility also exists of creating any type of part yourself (although this can be highly technical for complex parts). For a list of parts included with Proteus, please click here. Some Options Below are some options which are available to someone who would like to get started with PICs:
Tips
*Prices exclude VAT and may be subject to the Rand/Pound or Rand/Dollar exchange rate, as well as change without notice. Please see the store for more information on pricing.
|